Tag Archives: bulbs

Amaryllis Planting and Care

Amaryllis Planting and Care

I may have done a similar blog to this one over the years but as many people get Amaryllis for Christmas I thought this would be a good time to remind people of how to look after them & get them to flower the following year – straight from the horse’s mouth, so to speak, as I’ve copied this text from

http://www.amaryllis.com/planting-and-care

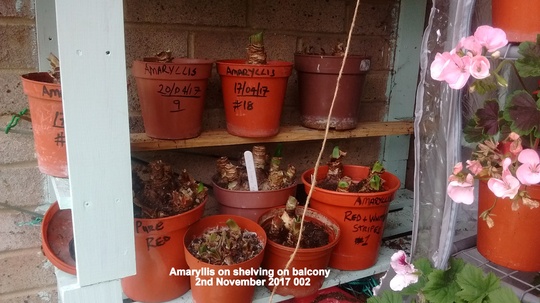
The photos are of my Amaryllis from last year (2017)

Amaryllis Planting and Care

Amaryllis Quick Tips:

Planting Period: October until the end of April.

Flowering Period: Late December until the end of June.

Flowering time is 7-10 weeks.

Larger bulbs produce more flowers.

Always store un-planted bulbs in a cool place between 40-50 deg. F.

Amaryllis-One of a Kind

Of all flowering bulbs, amaryllis are the easiest to bring to bloom. This can be accomplished indoors or out, and over an extended period of time. The amaryllis originated in South America’s tropical regions and has the botanical name Hippeastrum. The large flowers and ease with which they can be brought to bloom make amaryllis popular and in demand worldwide. The amaryllis comes in many beautiful varieties including various shades of red, white, pink, salmon and orange. There are also many striped and multicolored varieties, usually combining shades of pink or red with white.

Preparation for Planting

The base and roots of the bulb should be placed in lukewarm water for a few hours. Remember, if you cannot plant the bulbs immediately after receiving them, store them at a cool temperature between 40-50 degrees F.

Planting

Plant bulbs in a nutritious potting compost, many are available pre-mixed. Plant the bulb up to its neck in the potting compost, being careful not to damage the roots. Press the soil down firmly to set the bulb securely in place after planting.

Placement and Watering

Plant the bulb, or place the potted bulb in a warm place with direct light since heat is necessary for the development of the stems. The ideal temperature is 68 to 70 degrees F. Water sparingly until the stem appears, then, as the bud and leaves appear, gradually water more. At this point, the stem will grow rapidly and flowers will develop after it has reached full growth.

Flowering Period

Bulbs will flower in 7-10 weeks as a general rule. In winter the flowering time will be longer than in spring. Set up your planting schedule between October and April with this in mind. To achieve continuous bloom, plant at intervals of 2 weeks for stunning color in your home or garden.

After-Bloom Care

After-Flowering

After the amaryllis has stopped flowering, it can be made to flower again. Cut the old flowers from the stem after flowering, and when the stem starts to sag, cut it back to the top of the bulb.

Leaf Growth and Development

Continue to water and fertilize as normal all summer, or for at least 5-6 months, allowing the leaves to fully develop and grow. When the leaves begin to yellow, which normally occurs in the early fall, cut the leaves back to about 2 inches from the top of the bulb and remove the bulb from the soil.

Bulb Storage

Clean the bulb and place it in a cool (40-50 deg. F), dark place such as the crisper of your refrigerator for a minimum of 6 weeks. Caution: Do not store amaryllis bulbs in a refrigerator that contains apples, this will sterilize the bulbs. Store the bulbs for a minimum of 6 weeks.

Plant Again

After 6 weeks you may remove bulbs whenever you would like to plant them. Plant bulbs 8 weeks before you would like them to bloom.

Amaryllis Planting and Care

Amaryllis Planting and Care

I may have done a similar blog to this one over the years but as many people get Amaryllis for Christmas I thought this would be a good time to remind people of how to look after them & get them to flower the following year – straight from the horse’s mouth, so to speak, as I’ve copied this text from

http://www.amaryllis.com/planting-and-care

The photos are of my Amaryllis from last year.

Amaryllis Planting and Care:

Amaryllis Quick Tips:

Planting Period: October until the end of April.
Flowering Period: Late December until the end of June.
Flowering time is 7-10 weeks.
Larger bulbs produce more flowers.
Always store un-planted bulbs in a cool place between 40-50 deg. F.

Amaryllis-One of a Kind:

Of all flowering bulbs, Amaryllis are the easiest to bring to bloom. This can be accomplished indoors or out, and over an extended period of time. The Amaryllis originated in South America’s tropical regions and has the botanical name Hippeastrum. The large flowers and ease with which they can be brought to bloom make Amaryllis popular and in demand worldwide. The Amaryllis comes in many beautiful varieties including various shades of red, white, pink, salmon and orange. There are also many striped and multicolored varieties, usually combining shades of pink or red with white.

Preparation for Planting:

The base and roots of the bulb should be placed in lukewarm water for a few hours. Remember, if you cannot plant the bulbs immediately after receiving them, store them at a cool temperature between 40-50 degrees F.

Planting:

Plant bulbs in a nutritious potting compost, many are available pre-mixed. Plant the bulb up to its neck in the potting compost, being careful not to damage the roots. Press the soil down firmly to set the bulb securely in place after planting.

Placement and Watering:

Plant the bulb, or place the potted bulb in a warm place with direct light since heat is necessary for the development of the stems. The ideal temperature is 68 to 70 degrees F. Water sparingly until the stem appears, then, as the bud and leaves appear, gradually water more. At this point, the stem will grow rapidly and flowers will develop after it has reached full growth.

Flowering Period:

Bulbs will flower in 7-10 weeks as a general rule. In winter the flowering time will be longer than in spring. Set up your planting schedule between October and April with this in mind. To achieve continuous bloom, plant at intervals of 2 weeks for stunning color in your home or garden.

After-Bloom Care:

After-Flowering:

After the Amaryllis has stopped flowering, it can be made to flower again. Cut the old flowers from the stem after flowering, and when the stem starts to sag, cut it back to the top of the bulb.

Leaf Growth and Development:

Continue to water and fertilize as normal all summer, or for at least 5-6 months, allowing the leaves to fully develop and grow. When the leaves begin to yellow, which normally occurs in the early fall, cut the leaves back to about 2 inches from the top of the bulb and remove the bulb from the soil.

Bulb Storage:

Clean the bulb and place it in a cool (40-50 deg. F), dark place such as the crisper of your refrigerator for a minimum of 6 weeks. *Caution: Do not store amaryllis bulbs in a refrigerator that contains apples, this will sterilize the bulbs* Store the bulbs for a minimum of 6 weeks.

Plant Again:

After 6 weeks you may remove bulbs whenever you would like to plant them. Plant bulbs 8 weeks before you would like them to bloom.

Amaryllis bulbs have now been moved

Amaryllis bulbs have now been moved

ALL of my pots of Amaryllis bulbs have now been moved to my son’s house where he has a big shed where he can keep them for me during the winter. I no longer have a single Amaryllis bulb in the house for the first time after 16 years of growing them!

Amaryllis on shelving on balcony

Amaryllis on balcony table:

Amaryllis leaves just cut off on balcony table:

I bagged them ALL up over the last week & this evening my son came round & we packed them into his car & he then put them in his shed – but I doubt he realized just quite how many bags of pots I had!

In each bag there were at least 6 pots & many of them had more than one bulb in them! One bag had at least 10 pots, maybe more, as it was the biggest bag of them all!

I think the best thing for the bulbs is that they stay in their pots during the winter & that the pots stay in the bags. I don’t think the shed is entirely frost-proof so I think that is the safest way for them to resist through the winter. If it turns out to be as mild a winter as we have had during the last few years they will survive perfectly well without any further attention (the great majority of the pots are bone dry) but if we are forecast extremely hard frosts then I will make arrangements with my son to give them some extra attention so as to keep them safe.

Amaryllis being shunted around house & balcony April 2017

Amaryllis being shunted around house & balcony April 2017

On living room table today:

My Amaryllis have been shunted around the house & balcony this week! Only today I made the biggest shake up of the week! During the frosty days (Tues – Thurs) this week the plants that I had been putting out on the balcony, to harden off, after they had finished flowering in our living room, had to be brought in at night & put out again the following day.

As I don’t think we are likely to have any more frosty weather in the coming week or two, I’ve moved lots of Amaryllis plants from the 2 bedrooms to the balcony. Now the only plants left are in the kitchen window where there are probably more than 20 pots waiting their turn to go out! They will have to stay there a week or two yet as there simply isn’t enough physical space on the balcony to put them out yet!

Just last week I planted up about 40 pots of Amaryllis bulbs! I don’t expect these to flower before July-August. Under our windows on the balcony there is a thick plastic ledge which runs the entire length of the balcony. I stacked the pots of bulbs 3 tiers high on the 2/3rds I can actually use. You will understand it better when you see one of the photos I took after I finished stacking them. Well I had to undo all that work so I could put my Amaryllis plants in their place.

A few just potted up:

http://media.growsonyou.com/photos/blog_photo/image/188074/main/Amaryllis_Baker_s_Dozen_just_potted_up_on_balcony_table_18th_April_2017.jpg!

But first I had to empty the mini-greenhouse on the big table in the most protected corner of the balcony. I had lots of Geraniums & Fuchsias as well as some pots of Amaryllis bulbs I planted up about a month ago & stacked inside. Eventually I cleared away enough space to be able to put most of the 40 pots inside. Then I had to make many trips in & out of the house to bring 3 or 4 plants at a time from the bedrooms to the balcony. Once on the balcony table I had to put short canes in the pots & tie string around them to hold up the leaves of the Amaryllis. They become very long & are strap like. They are a terrible nuisance & they break very easily. Some leaves are already more than 50-60cm long! Then I had to stack them were the bulbs in pots had been before being moved to the mini-greenhouse.

On Sunday I will speak to my friend Gerry, who told me a couple of months ago I could put them in his garden, or rather his very elderly neighbour’s garden. She told him that he could use her garden for whatever he liked as she could no longer grow vegetables; she didn’t feel she had the strength any longer to be able to run her vegetable garden. He’d been helping her with her garden for years.

But before I can take them to the garden they need some hardening off as they have not been able to go outside before now. At least if we are warned of a possible frost during the next 2 weeks I can cover them all with some fleece being as they are all so close together.

Mini-Daffs & Tulips in pots on the balcony railings

Mini-Daffs & Tulips in pots on the balcony railings

I planted some Mini-Daffs & Tulips in pots on the balcony railings in mid-October after removing the Begonias that had grown in them all summer a few days before.

I had bought some packets of small Narcissi bulbs & dwarf Tulips precisely to put in these :

but I also put some in the troughs on the bar that goes around the middle of the balcony railings.

As I have 3 troughs I planted them all exactly the same so I’ve added photos of all 3 troughs showing how I put short stemmed Tulips, mini-Daffs &, finally, Crocuses on top but only one of each trough:

I have planted up the 8 clay pots I have, 2 of them new, as well as 2 plastic pots & have put them in the aluminium rings I bought & used many years ago in Spain when we used to live over there:

At the present moment I don’t have any Pansies or Violas to overplant them with as I do every year. I hope to get some soon from the open air market in town.

Other years I’ve bought them there & they have done pretty well though I’ve had little success with them for the last few years. Several years they were infested with a heavy plague of tiny, itsy bitsy grey-white aphids that cover every green surface & suck the life out of the plants.

I mentioned this last year to the lady on the stall, when I was buying last year’s plants, & she assured me it wouldn’t happen again this year as all their plants are treated with a systematic insecticide before leaving the greenhouse.

In effect they didn’t become infested but they died mysteriously in the spring before they had chance to flower but I’ve absolutely have no idea of the cause! They just collapsed as if their roots had been eaten away or they had rotted away. On removing them I broke open the rootballs but they weren’t rotting nor did I find any sign of anything eating their roots, the rootballs were chock a block of roots. The only symptom I noticed was that they collapsed & turned brown. I hope that doesn’t happen again. They had been planted in new compost: I’d renewed the compost in all my pots & troughs last year before autumn planting.

I also planted up the 3 big, white troughs on the balcony floor, up against the railings. I put long stemmed Tulips & Daffodils in them & overplanted them with a few Crocuses from the last 2 years that had survived. Many of the Daffs will be quite small I think as many of them didn’t appear to be of flowering size. I’ll have to wait & see what happens.

When I get some plants to put in I’ll post a last photo here.

Balcony gearing up for summer

Balcony gearing up for summer

Have you enjoyed the week or so of warm weather we have had? I’ve been able to get the balcony cleaned up & started some preparations for the summer planting season. You wouldn’t believe the amount of work a small balcony causes!

The last of my Daffs are now practically finished & at the end of the month I shall take them out of the pots on the balcony railings & put the Begonias I saved from last year in their place.


These are growing well now on the balcony but now I have a problem of what to do with so many plants that I have! I have managed to keep the Fuchsias from last year, for the most part, alive as well as lots of Geraniums.


In the white troughs on the balcony floor the Dahlias from last year are also sprouting! I thought they would die over the winter as I didn’t take them out, but they have survived.

Last year all these plants (except the Geraniums) were small plug plants but this year the majority are bigger plants in 5″ pots! That means I need to dig bigger, deeper holes in the troughs to put them in again but if I do that I will damage the Daffodil & Hyacinth bulbs that are currently growing there not to mention the Dahlias that are sprouting again!


Daffodils on balcony (railings)

Daffodils on balcony (railings)

DAFFODILS

“I wander’d lonely as a cloud
That floats on high o’er vales and hills,
When all at once I saw a crowd,
A host of golden daffodils,
Beside the lake, beneath the trees
Fluttering and dancing in the breeze.”

“Daffodils”: http://www.bbc.co.uk/poetryseason/poems/daffodils.shtml  by W.Wordsworth on the BBC Poetry seasons web page.

I thought I would start this blog a little differently to how I usually begin by citing the 1st verse of William Wordsworth famous poem, (I have to admit to never having read!) on Daffodils.

This is also a little different in that, although the title says “Daffodils on balcony railings”, these particular Daffs are the smaller versions of those we see most commonly in our parks, gardens & streets. They are not the very, very common “Tete-a-Tete” (of which I have some as well!)

I don’t remember the name of this white one, but the bulbs were saved during the summer from spring 2015 & replanted in the autumn of 2015:

Here are the best views I was able to get of the pots on the balcony railings from the inside:

Although the caption on the photo reads “Mini-Daffs” these are in fact ‘Tete-a-Tete’ Daffs I’ve saved over several seasons:

The same ‘Tete-a-Tete’ Daffs as they were just beginning to open towards the end of February 2016:

Here are photos of the packets of bulbs when I bought them, I think I bought 3-4 of each of the two kinds:

Here is a photo of when I was planting them in the pots to go on the balcony railings:

As I normally do, I overplanted the Daffs with Winter Flowering Pansies. Only the poor things died on me half way through the winter even though we had such a mild winter. I was disappointed as I love Pansies & they also provide interest during the winter when the pots look to be empty:

At the end of January 2016 I had Daffodils (tall ones) that were about to flower! I’d never seen Daffodils flowering so soon in the year before! I’ve certainly never ever had Daffodils flowering so early on my balcony before!

Pots of Daffodils on the balcony railings seen from outside at the beginning of April 2016:

Now here are the very latest photos of these lovely Daffodils seen from the outside:

I hope you all like these Rockery Daffs as much as I do! Maybe in the autumn I shall be on the look out for more to put in the pots & troughs on the balcony railings. I’m very pleased with how these turned out!

Some beautiful Amaryllis for March.

Some beautiful Amaryllis for March.

I thought I would show you some of the beautiful Amaryllis have been flowering on our living room table for the last 3 months:

So let’s start with this wonderful view of flowering Amaryllis bulbs on our living room table taken today, March 7th 2016:

(The flowers on the table in front of the Amaryllis are plants given to my wife for Mother’s Day, a Kalanchoe, from our youngest son, a Pansy in a tiny painted pot from church (given to all the ladies in church) & some Lilies from our daughter.)

Another photo from today of one of the Anglo-American hybrids, the fifteenth to flower since the beginning of the year:

This photo is of one of my previous hybrids that began flowering in 2010 & have flowered every year since:

The next picture is of one that may possibly be an offset of ‘Pinky’ that is flowering for the very first time

A lady on another gardening forum I also post on sent me an Amaryllis bulb, 4 or 5 years ago, called ‘Pinky’, a very apt name as it’s a lovely light pink. The flowers are much more open, having lost their original trumpet shape. As this flower has only just opened today it may not yet have reached it’s maximum size & aperture. The original bulb must be one of those that hasn’t flowered this year so far.

Here is a typical red, but I found it to be the darkest of all my reds to flower so far this year. Again this is a bulb from the previous sowing of 2006. That doesn’t mean to say it IS one of the original bulbs that first started to flower in 2010, no, it may be an offset of one of those:

Another one from previous years. The comments I’ve made above could well be applied to this one as well:

Anglo-American hybrids:

This one however is the very first of my Anglo-American hybrids to open its very first flower ever!:

It opened while still on the bedroom windowsill where it has spent half the years for the last 3 years. The other half of the years it spent on Gerry’s allotment. All my Amaryllis spent six months of the year on the allotment & the other 6 months on our windowsills in the kitchen & two bedrooms. In the UK they can’t be left outdoors from the middle of October to late April or early May.

I’ve written a blog on the origin of these hybrids which you can read about in my  previous blog.

Here is a picture of the first 2 Anglo-American hybrids to open side by side in the middle of January:

Here is another beautiful Anglo-American Amaryllis, it’s been in flower since the middle of February:

This one I took on Leap Year’s Day, 29th of February:

Here are several of them flowering on our living room table at the start of February this year:

These are some of the older hybrids flowering in our living room a few days before those above:

One of the Reds is in a bowl on the living room table as one of the flowers accidental broke off as I was trying to get it out of the kitchen windowsill.

My wife got me to change the old Venetian blinds & put up some curtains in their place last November/December. That now makes it very difficult to move the plants in & out of the window as well as making watering them much more difficult for me!

Well I hope you liked seeing these wonderful plants in flower in our living room this year. I think you will agree they look much better en masse than just one or two on their own! Remember also ALL these plants are grown from my own seeds, NONE of them has been bought. Since the first seeds sown in 2005 to now I’ve never been without a few plants in flower for around six months a year every year!

I’m going to add just one last photo I took a couple of days ago of the biggest flower of them all – it measures 8 (EIGHT) inches/20cm across! I took a photo with my hand in front of the flower with my fingers stretched as far apart as I could possibly manage & I barely reached the tips of the petals on either side:

Same flower but with my hand removed!


Difference between “Anglo-American” and “Ordinary” hybrid Amaryllis

Difference between “Anglo-American” and “Ordinary” hybrid Amaryllis

As several of you ask about the difference between my “ordinary” hybrid Amaryllis & my “Anglo-American” hybrids I’ll explain again, though I think I’ve really explained a few times before!

(The 4 scapes (flower stems) in the middle of these two photos are Anglo-American hybrids, only the end two are older Amaryllis hybrids)

The “ordinary” hybrids are the ones I’ve been growing from my own seeds since before I joined GoY back in April 2009! (One of the first blogs I ever wrote on GoY was about growing Amaryllis from seed!)

These came about because in 2001 I bought 3 Amaryllis bulbs from a Dutch trader in what was the very first International Market held in Huntingdon. These were unnamed, unpacked bulbs I bought in a street market. These bulbs grew & flowered for several years until one year it occurred to me to try & cross-fertilize them & try to get some viable seed. I’d tried some years before when we still lived in Cuenca, Spain. At that time none of the seeds germinated. This time I had an overwhelming number of seeds that germinated!

After 4 years these flowered for the first time & I used a photo of me standing in front of them all, (now we call them “selfies”, back then we called them “self portraits”!), flowering on our living room table, as my avatar photo on GoY for many years.

Then, in 2012, a lady, on another gardening forum I also post on, sent me some, unsolicited, pollen from her Amaryllis. As I had some in flower when it arrived I tried cross-fertilizing some of my plants with the pollen. Only one bulb gave me a couple of seed pods full of seeds. I sowed some & sent some to the lady in the USA who’d sent me the pollen.

(Unfortunately she has never told me if she sowed them nor if they have grown or flowered for her :-(( )

When these germinated I thought I need some way of identifying them in the future as they all look a like & to be able to send a “progress report” to the lady in the USA. The name “Anglo-American hybrids” came to my mind, as, after all, the pollen came from the USA but the bulbs from the UK!

So there you have it – in a (rather big) nutshell! – why some are just simply called “Amaryllis hybrids” & others are called “Anglo-American hybrids”.

Of the “Anglo-American hybrids” I currently have 4 bulbs on our living room table, one of which has opened its first flower today for the first time since sowing 4 years ago! There are 3 more in bud, one of which will flower in a day or two, while there are two others which will still take a few more days. While, in the bedroom, on the windowsill, there are more bulbs with scapes at differing heights which will flower during February.

I have 20 pots of these “Anglo-American hybrids” in all! One has finished flowering, one is opening today & several more will be opening their flowers for the first time ever as the week progresses.

The photos I’ve included in this blog are for illustrative purposes really as most of my photos from the past few years are still locked away on the hard disk of my old desktop computer which I have no access to. :-((

Some of them, nevertheless, are relevant to what I’ve written in this blog. As they all have the date they were taken on them you will easily see which photos relate to the present time.

Amaryllis hybrids have now begun to flower!

Amaryllis hybrids have now begun to flower!

Though I’ve mistakenly put Anglo-American hybrid on some of the photos, this particular bulb is one of 3 bulbs that I put in the same 5″ pot last year when I was repotting many of my bulbs last year.

At least one of the pots was mistakenly put in the other bedroom with the Anglo-American hybrids. I really should have realised what had happened when the scape began to grow as it is in a pot with several other offshoots which I intended to separate & repot this year. All my Anglo-American hybrids were put ONE to a 5″ pot last year. NONE went into a pot together. This alone should have made me suspicious when I started labelling it as an Anglo-American Amaryllis!

Many pots last year were overcrowded with the new offsets that had been forming & were breaking the pots. I use plastic pots, not ceramic or clay so they are easily damaged when the bulbs/offsets begin to expand. As this process has to be done while they are dormant it wasn’t until February 2015 when I finally got around to doing it.

(Wrong date – should have been 16th January 2016!)

This year I’ve been confronted with a similar problem only I started to “tackle” it back at the end of November/beginning of December before I brought the plants home from the greenhouse on Gerry’s allotment. As space in our flat is really at a premium, & there was even less this year, I decided to empty out as many of the the remaining pots as I could in order to save on space in the flat during the winter. In previous years they used to spend the winter in their pots on the windowsills of our 2 bedrooms & in the kitchen where we have a 3m (10ft) windowsill. Last year all these windowsills were filled up to their maximum capacity – even though they were in tiers 4 rows high!

So many had to go on top of a big wardrobe in one of the bedrooms. None received any water until buds were seen to be coming out of the necks of the bulbs where upon I began to give them a little water again, increasing as time went by.

All the pots in one bedroom windowsill had to go out onto the balcony in mid March – the first time I’ve ever put them out so early as we often get frosts till the end of the first week in may some years. I did try to cover them with a plastic sheet on nights when frost was forecast & fortunately they all survived! :-)) I also took them down to the Gerry’s greenhouse on his allotment much earlier than other years. The greenhouse has no heating & a couple of pieces of glass had got broken during the winter making it prone to frost. Nevertheless they still managed to survive & were later moved out of the greenhouse on to some shelving on the plot itself for the summer. I had to take my bulbs down in several journeys over several weeks as they finished flowering at home.

One bedroom windowsill has 4 tiers of bulbs – all Amaryllis hybrids I’ve grown from my own seed:

These have grown & flowered & multiplied over the years. I only started giving them water a couple of weeks ago. Some will have to me moved into new pots as lots of the pots have 5-6 or more offsets in them! Last year I didn’t have the space, compost or pots to pot up everything into its own individual pot. Although I don’t generally let offshoots or seedling bulbs go into hibernation till after they have flowered for the first time I just couldn’t leave them growing this winter.

I may lose a few bulbs because being so small they are unable to store sufficient water or food. Nevertheless I expect the majority to pull through with very few casualties.

I’ve put 20 big bulbs in 6″ pots now on the kitchen windowsill, they all have buds at different stages, some are only just peeping out of the bulb neck others are several inches high already.

These were some of the bulbs I put in paper bags to remain dry over the winter:

Some of those that I emptied out of their pots in the greenhouse last December. The buds had started to grow quite high on some of the bulbs! These will be in flower in about a month’s time. During February I will have dozens of bulbs flowering – as well as in March & April! Having so many I have to start them off over a period of a couple of months so that way I get flowers for several months in a row!